Features
See allSurface preparation:
- Performance of this coating is directly related to the degree of surface preparation
- Surface must be clean and free from grime, dust and grease
- Clean areas severely affected by algae and fungus, thoroughly before applying primer
- Treat fungus or algae, with Berger Sterilizing Solution
Application Procedure:
- Allow new concrete to cure for at least 7 days before application
- Sand new wood to a smooth finish
- Counter sink nails in exterior wood work and fill with a water based caulking compound
- Thin 30% before applying to metal & hard glossy surfaces
- For severe staining on wooded surfaces apply one more coat of primer
- Allow 1 hour drying before applying topcoat on metal & concrete
- Allow 2 hours drying before applying topcoat on wood
Tips: When painting in dark shades tint Grip & Seal in a tone of the topcoat colour to minimise the number of topcoats.
Tools you will need
Available Packs

1 Coat
9-10 m2/ltr**
Coverage
On well-prepared surfaces, as per the painting system recommended. Please refer to the Product Data Sheet for surface preparation and method of application.
** Actual coverage may vary from the quoted coverage due to factors such as method and condition of application, surface roughness, and porosity.
Solve Potential Paint Problems
The scaly pattern on your walls is called Alligatoring; which can be described as a patterned cracking appearance in the paint film, resembling the scales of an alligator.
What are the possible causes?
- Applying a hard, rigid coating, like an oil-based enamel, over a more flexible coating, like a water-based latex primer
- Applying the topcoat before the first coat has dried
- Loss of elasticity in the paint film due to the natural aging of paint
- Failure of the topcoat to bond smoothly with the basecoat
- Applying paint too thickly
- Rate of surface drying is significantly higher than base, in thickly applied paint
What is the solution?
- Remove old paint by scraping, sanding or chemical removal
- Wash with appropriate cleaner and allow surface to dry
- Sand glossy surface to dull finish for application of topcoat
- Ensure surface if sanded to a smooth finish
- Prime before applying premium acrylic paint such as Royale
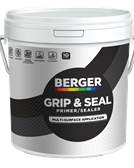
- Berger recommends Berger Grip & Seal Multi-Surface Primer
We recommend you use these painting systems in order of base coat, first coat, and second coat:
The bubbles or blisters on your walls are called blistering. Paint blisters or bubbles occur when there is loss of adhesion between the paint film and underlying surface.
What are the possible causes?
- Applying oil-based paint over a damp or wet surface
- Moisture seeping through to the exterior surface from an interior source
- Exposure of latex paint film to moisture shortly after the paint has dried, especially in cases of poor surface preparation
What is the solution?
- If blisters do not go all the way down to the substrate, remove by scraping and sanding
- Repaint with premium Berger topcoat for wood or wall
- For interior wood & wall surfaces, Berger recommends Royale
- Blisters all the way down to the surface are a sign of a more significant source of moisture, which must be addressed before any painting can begin
- Once resolved, remove all loose paint and repair any loose caulking
- Allow surface to dry thoroughly before the application of an appropriate primer and a moisture resistant premium topcoat
We recommend you use these painting systems in order of base coat, first coat, and second coat:
The splitting of dry paint film through at least one coat. In early stages it appears as hairline cracks and in the later stages flaking occurs.
What are the possible causes?
- Applying low quality paint to the surface, with inadequate adhesion and flexibility
- Applying too thin a coat of paint to the surface
- Inadequate surface preparation
- Failure to prime bare wood before top-coating
- Oil paint hardens with age, until it eventually cracks
- Painting on damp wood
What is the solution?
- Remove loose paint or flaking paint by scraping or wire brushing
- Sand the area to feather the edges
- Prime bare spots
- Repaint with two coats of a premium paint
- Berger recommends 2 topcoats over 1 primer coat
We recommend you use these painting systems in order of base coat, first coat, and second coat:
Efflorescence is the formation of crusty white salt deposits, leaching on to the surface of masonry or mortar as water passes through it.
What are the possible causes?
- Efflorescence occurs when water gets into concrete and dissolves lime within the concrete matrix
- As the water evaporates, lime is carried to the surface and deposited as salt
- Excess moisture escaping through the walls
- Insufficient curing time for new cement or mortar
- Painting on incompletely dried or uncured concrete
- Failing to adequately prepare the surface by removing all previous efflorescence
What is the solution?
- Eliminate the source
- Seal cracks with Berger Siliconized Acrylic Caulk
- Remove efflorescence and loose material by wire brush or power washer
- Apply Berger Alkali Sealer
- Apply a premium quality topcoat like Berger Weatherproof Ultra
We recommend you use these painting systems in order of base coat, first coat, and second coat:
Foaming and cratering frequently occur when bubbles form. When the bubbles break during application and drying, they result in small, round concave depressions or cratering.
What are the possible causes?
- Shaking a partially filled can of paint
- Applying paint too rapidly, especially rolling
- Using low-quality paint or very old latex paint
- Using a roller cover with the wrong nap length
- Excessively rolling or brushing the paint
- Applying a gloss or semi-gloss paint over a painted surface
What is the solution?
- All paints will foam to some extent during application
- Premium quality paints are specially formulated, so the bubbles break while the paint is wet, allowing for good flow and appearance
- Avoid excessive rolling or brushing of the paint or using old paint
- Apply gloss and semi-gloss paints with a short nap roller
- Apply appropriate primer/sealer when painting over a porous surface
- Problem areas should be sanded before repainting
We recommend you use these painting systems in order of base coat, first coat, and second coat:
Mildew is both an interior and an exterior problem found in damp areas receiving little or no sunlight. It appears as black, grey, green, or brown spots on any surface.
What are the possible causes?
- Failure to treat existing mildew before painting
- Using lower quality paints with little or no biocide
- Failing to prime bare wood before painting
- Painting over a substrate or coating from which mildew has not been removed
What is the solution?
- Treat mildew with Berger Sterilizing Solution
- Remove mildew by pressure washing the surface
- Allow solution to remain on surface for at least 1 hour
- Rinse thoroughly with water and allow surface to dry before painting
- Wear protective eyewear, protective clothing, and waterproof gloves
- To protect against re-growth use premium quality paint
- Clean high-moisture areas at 6 month intervals to slow re-growth
We recommend you use these painting systems in order of base coat, first coat, and second coat:
Reddish-brown stains on the paint surface are called nail head rusting and are usually a sign that the surrounding wood may be rotting.
What are the possible causes?
- Non-galvanized iron nails exposed to moisture
- Nails not properly countersunk
- Nail heads not caulked with siliconized caulk before painting
- Frequent exposure to damp wood
What is the solution?
- Completely remove the nail and replace with a new nail
- Wire brush each nail head until bare shiny metal
- Clean and spot priming with appropriate Berger primer
- Caulk nail heads with paintable Berger acrylic caulk
- Topcoat with premium Berger acrylic or oil paint
We recommend you use these painting systems in order of base coat, first coat, and second coat:
Patchiness generally occurs when insufficient paint has been applied or when paint is applied unevenly, resulting in a variation of the film build leading to patches.
What are the possible causes?
- Inconsistent distribution of paint on the surface
- Incorrect or low quality paint brush or roller
- Failure to apply a primer over joint compound
- Applying paint over joint compound not fully dried
- The top coat is applied over spot-puttied surfaces
- Variations in surface gloss can cause paint to appear patchy
What is the solution?
- Increase the amount of paint on the brush or roller to allow better distribution
- Apply the paint in a grid fashion to ensure an even finish
- Allow puttied wall to dry evenly before priming
- By applying one coat of appropriate premium Berger Primer
- Apply two coats of premium Berger acrylic topcoat
- Refer to Berger Technical Support for primer options
We recommend you use these painting systems in order of base coat, first coat, and second coat:
Peeling often occurs when high levels of moisture penetrate the paint film, eventually pushing it away from the surface.
What are the possible causes?
- Excessive atmospheric moisture, e.g. shower
- Excessive moisture due to high humidity, e.g. basement and/or foundation
What is the solution?
- Remove loose paint by scraping or wire-brushing
- Remove any efflorescence and mildew
- Power wash with plain water
- Scrape cracks clean of debris and seal with Berger acrylic caulk
- Remove residual dust particles, taking care to not let water into cracks or porous areas
- Apply premium Berger primer for best durability and resistance
- Always overcoat primer with premium topcoat
We recommend you use these painting systems in order of base coat, first coat, and second coat:
Picture framing occurs when the brushed areas appear darker than the areas painted with roller, resembling a picture frame.
What are the possible causes?
- Applying paint at different thicknesses in brush and roller application
- Failure to keep a wet edge while painting
- Incomplete mixing resulting in paint not being uniformly incorporated
- Using a roller cover nap that is too long, which will produce a heavy texture
- Using of different techniques in the same area, such as spraying and brushing
What is the solution?
- Ensure similar spread rates with brushes and rollers
- Don't cut in the entire room before roller coating
- Work in smaller sections of the room to maintain a "wet edge"
- Ensure correct colorant-base combinations are used
- Ensure uniform mixing of the paint
We recommend you use these painting systems in order of base coat, first coat, and second coat:
Failure of paint to stick to the surface on which it has been applied and/ or to itself can be described as poor adhesion.
What are the possible causes?
- The biggest cause of poor adhesion is poor surface preparation
- Insufficient sanding before applying any primer
- Applying primer too thin
- Diluting the primer thereby weakening its ability to stick to the surface
- Failure to prime the surface in the first place
- Painting wet or damp surface
- Incompatible coatings, such as a water based coating over oil
What is the solution?
- Use the correct type of primerfor the surface
- Apply primer following manufacturer’s recommendations
- Never paint on a wet or a damp surface
- Always ensure that the area is clean, dry and free from contaminants before painting
- Treat any surface problems before priming
- Ensure that primers and topcoats are compatible and suitable for the surface being painted
We recommend you use these painting systems in order of base coat, first coat, and second coat:
Poor hiding occurs when paint fails to obscure or hide the surface to which it is applied.
What are the possible causes?
- Using low-quality paint with little hiding power
- Spreading paint too thinly or unevenly
- Over-thinning paint beyond the recommended amount
- Failure to prime the surface before top-coating
- Painting a porous or absorbent surface
- Using incorrect or poor quality tools
- Inadequately mixed paint
What is the solution?
- Prime first, if moving from a significantly darker to a light colour
- When painting in a dark colour, tint primer in a similar tone to the topcoat shade
- Use premium quality paint for better hiding and flow
- Use quality and correct tools for the job
- Follow manufacturer's recommendation for thinning
We recommend you use these painting systems in order of base coat, first coat, and second coat:
The easy wearing away of paint when scrubbed with a brush, sponge, or cloth is indicative of a paint which is exhibiting poor scrub resistance.
What are the possible causes?
- Insufficient time allowed for paint to fully dry before washing or scrubbing
- Use of an abrasive cleaner
- Choosing the wrong product or sheen for the area
- Using low quality paint
- Overly aggressively scrubbing the painted area
What is the solution?
- Areas requiring frequent washing will require a high quality paint formulated especially to provide such performance
- High traffic areas may require a silk, semi-gloss or gloss rather than a flat paint
- Allow adequate dry time, as scrub resistance will not fully develop until the paint has thoroughly cured. Typically, 5 days
- Use non-abrasive material and mild detergent where possible
We recommend you use these painting systems in order of base coat, first coat, and second coat:
Failure to resist absorption of dirt and stains, occurs with paint not made specifically to resist dirt and stains.
What are the possible causes?
- A highly porous surface can lead poor stain resistance
- Using of lower quality, flat latex paint
- Applying paint to an un-primed surface
What is the solution?
- Use a paint specifically designed to provide stain and dirt resistance
- Use premium acrylic paint designed for ease of stain removal
- Premium quality acrylic paints contain more binder, preventing stains from penetrating painted surfaces and allow for easy removal
- Priming new surfaces provides maximum film thickness of a premium top coat
We recommend you use these painting systems in order of base coat, first coat, and second coat:
Failure of paint to dry to a smooth film, resulting in unsightly, unintentional brush or roller marks after the paint has dried.
What are the possible causes?
- Re-brushing or re-rolling fresh paint on partially dried paint
- Applying paint too rapidly or for too long
- Using wrong type or poor quality brush, roller or nap size
- Applying too thin of a paint film
- Painting a hot surface or in direct sunlight
- Coating a very porous surface
- Incorrect rolling technique
What is the solution?
- Allow paint to dry thoroughly before applying second coat
- Wait until the paint has dried thoroughly before touching up
- Use correct rolling or brushing technique
- Follow label directions for appropriate quality, applicator size, and type needed
- Follow label directions for correct film build
- Prime to seal porous surfaces
We recommend you use these painting systems in order of base coat, first coat, and second coat:
The hardening on the outer layer of a thick coat of paint before the under layer dries results in the paint film having a rough, wrinkled appearance.
What are the possible causes?
- Applying paint too thickly especially with oil-based paints
- Applying a second coat of paint before the first has dried
- Not following recommended drying times
- Painting during extremely hot climate causes the paint film to dry faster on top than on the bottom
- Uncured paint that is exposed to high humidity is also prone to wrinkling
- Painting over contaminated surface e.g., dirt, grease or wax
What is the solution?
- Allow wrinkled coating to dry completely
- Once dry, scrape or sand to remove wrinkled coating
- In reapplying paint, follow recommended drying between coats
- Avoid extremes in humidity and heat during application
- Use premium quality exterior paint
- It’s always better to apply two thin coats, than one thick coat
- Consider using a water-based system for a shorter drying and recoating time
We recommend you use these painting systems in order of base coat, first coat, and second coat:
The yellow cast that appears over previously painted white surfaces is called yellowing, and mostly occurs with oil paints.
What are the possible causes?
- Use of oil paint in areas not receiving direct sunlight
- Oxidation of alkyd or oil-based paint or varnish as it ages
- Heat from stoves, radiators and heating ducts will turn oil paint yellow
- Lack of light in dark areas such as behind picture frames, appliances and inside closets
- Tobacco staining or other environmental contaminants
What is the solution?
- Because of their drying process water-based painting systems fear better in enclosed areas
- Water-based acrylic paints are non-yellowing
- If your preference is for oil paint, ensure maximum sunlight to minimise yellowing
We recommend you use these painting systems in order of base coat, first coat, and second coat:
we also recommend
-
Get Inspiration
-
Make Your Plan

Let us design a project plan to suit your needs.
-
Colour Tools


-can_3545.png?width=82&height=102&mode=crop)


-can_3028.png?width=82&height=102&mode=crop)


